Home » Articles posted by Ellena Knight
Author Archives: Ellena Knight
Kitchen Remodeling Tips For Eco-Conscious Buyers
A well-designed kitchen not only caters to a homeowner’s aesthetic preferences but also enhances functionality and promotes energy efficiency—important attributes that set a home apart for eco-conscious buyers.

A cramped kitchen packed with dated features needed an overhaul. A fresh paint job and light-colored cabinetry brighten the space, while new white upper cabinets stretch to the ceiling to expand visual height. A backsplash with Moroccan tiles adds a bold splash of pattern. Contact Farmers Branch Kitchen Remodeling for professional help.
Cabinets have a significant impact on kitchen design, both in their appearance and function. Incorporating an array of cabinet styles and construction methods, homeowners can create a customized look that blends current trends with their unique style preferences. Additionally, they can balance quality and affordability to ensure their budgetary goals align with a long-term investment in their home’s value.
Cabinet colors and finishes significantly impact kitchen design, from a color palette that embraces farmhouse-inspired hues to a finish that highlights the natural wood grain. Additionally, homeowners can maximize storage solutions by incorporating built-in organizers. Finally, a variety of hardware options can elevate the appearance of cabinets and provide functionality for their contents.
Choosing the best cabinet materials for your project can make or break a kitchen remodel. This section explores strategies for balancing quality and affordability, addressing factors that influence cabinet costs and providing tips on effectively comparing prices.
A wide range of cabinet construction techniques are available to homeowners, ranging from simple slab doors to intricate raised panels. Additionally, custom features like dovetail drawers and soft-close concealed hinges can enhance the appearance of a kitchen. While these options are often more expensive than basic slab door construction, they provide a higher level of durability and increased functionality. Additionally, these upgrades can increase resale value and help protect the environment by reducing waste. Additionally, homeowners can choose a slab door with no frame or panel – known as “shaker” style cabinets – for a sleek, minimalistic aesthetic that can be spruced up with a unique paint color or statement handle. Alternatively, you can also opt for a frameless, flat-front style with recessed-panel doors for a traditional kitchen look.
Countertops
Countertops are one of the most important kitchen features and are critical to a successful remodeling project. They need to be functional, work with the rest of your decor and design aesthetic, and be within budget. There are many different types of countertops to choose from, including natural and engineered products. Each type has its own unique advantages and disadvantages, but some popular choices include granite, quartz, concrete, reclaimed wood, and soapstone.
Reclaimed wood countertops are eco-friendly and add a unique character to the kitchen. They’re also strong enough to stand up to cutting and chopping, making them a great choice for chefs or foodies who want to get their hands dirty. If you’re going with reclaimed wood, make sure to use a sealer to protect the surface from moisture and staining.
Concrete countertops are an increasingly popular option for modern and industrial kitchens. They’re super customizable and can be molded to fit any shape or style. They’re also durable, easy to clean (no scrubbing required!), and bacteria-resistant. They can be poured in any color and can even be inlaid with materials like broken tiles or sea shells to create patterns under the surface.
For a more traditional look, tile countertops are a classic choice. They’re easy to install, inexpensive compared to slab granite, and come in an enormous range of colors and styles. Tiles can be arranged in a pattern to form an intricate backsplash or border, or they can be installed as a continuous surface with a smooth transition from the floor. If you’re going with tile, it’s best to hire a professional installer for the job to ensure accurate measurements and a smooth installation.
Flooring
When it comes to kitchen home improvement, flooring is an often overlooked step that can dramatically impact the room’s appearance. There are countless options available in terms of style, color, material and durability. The best way to decide on a floor is to consider your lifestyle and how you use the space. If you have children or pets, consider durable choices that will stand up to frequent traffic.
Before remodeling, take time to envision what your dream kitchen looks like. Visit showrooms and design blogs to find inspiration. Once you have a vision, create a kitchen mood board to help guide your decision making.
Depending on the size of your kitchen, this may take anywhere from two to three days. This step is important because it will allow you to visualize how your new kitchen will function and feel. It is also an excellent opportunity to ask your remodeler any questions or concerns you might have.
Once the layout is set, drywall can be installed. Rough-in work, including upgrading plumbing and electrical systems, is usually completed before the installation of cabinets and flooring. It’s a good idea to bring in your appliances during this phase to reduce the risk of damaging your new floors.
This kitchen needed a complete makeover to modernize the space and add functionality. Removing a wall opened up the dining area to the kitchen for family-friendly entertaining. A large island replaced the awkward peninsula and a light color palette brightened the space. A custom-built range hood and open shelving repurposed cabinetry for stylish storage. The result is a fresh, functional kitchen. A well-planned remodel will enhance your living space and increase your home’s value. However, be mindful of the scale and cost of the project as it relates to your neighborhood’s average home values.
Appliances
One of the most significant expenses for a kitchen remodel, appliances are the backbone of your cooking space. Selecting the right appliances can improve functionality and aesthetics while also increasing efficiency, longevity, and value. Because of this, it’s important to consider your appliance needs early in the design process. It’s a great idea to visit a showroom and test-drive appliances before making your final decisions. This will help you avoid a costly mistake that may be difficult to reverse.
Whether you’re a culinary enthusiast or looking to maximize energy efficiency, there are plenty of options on the market that fit your needs. The appliance market is full of mainstream brands that provide reliability and performance at a price point that fits most budgets. Alternatively, there are high-end brands that provide unparalleled quality and advanced features to transform your kitchen into a chef’s paradise.
Consider the type of cooking you’ll be doing in your kitchen to determine which appliances are best for you. For example, if you’re preparing a lot of meals for the family or planning to entertain frequently, a double oven is an essential upgrade. Similarly, having the right refrigerator size and configuration ensures your food stays fresh while complementing the overall look of your kitchen.
While kitchen remodeling and renovation are often used interchangeably, they’re different processes with distinct goals. Remodeling involves crucial changes to the layout and design of your kitchen, such as removing walls or expanding storage space. Renovation, on the other hand, focuses on refreshing surfaces and replacing fixtures to add functionality and style. Regardless of which option you choose, working with a professional kitchen designer can simplify the process and help you achieve your dream kitchen.
Lighting
Lighting is a huge factor in making your kitchen functional and beautiful. Gone are the days when a single large fluorescent light would do the trick. Now, carefully planned lighting can create a cozy atmosphere for family meals and entertaining guests, brighten up high-use areas like the sink and stove, and highlight beautiful finishes and decor.
Using multiple types of lighting allows you to layer your kitchen for different activities and moods. Ambient lighting adds a general sense of illumination while task lighting illuminates specific work zones. Accent lighting adds depth and highlights decor or architectural features. Your design-build team will help you choose the best fixtures to meet your needs and complement your style.
Pendant lights are popular for adding design flair and personality to your kitchen space. They come in a variety of shapes and styles, so they are easy to find that blend with your other decor elements. You can also find kitchen light fixtures in a range of finishes and hues to match your color palette. For example, designer Andrew Howard used black soapstone counters and cabinets in his kitchen, so he chose pendant lights with slightly tinted glass covers for a warm look.
Recessed lighting is a versatile kitchen light fixture that can be installed on the ceiling or on the wall. They can be recessed in your ceiling to provide ambient lighting or mounted on the wall to illuminate open shelving or other features of your kitchen. They are especially effective in small spaces where a larger fixture may overtake the room.
Under-cabinet lighting is a great way to illuminate workspaces and highlight your custom cabinetry. They are available in a variety of brightness levels and can be controlled with a smartphone app or voice-controlled system. They are also a great option for areas where you need more focused task lighting, such as over the island or bar.
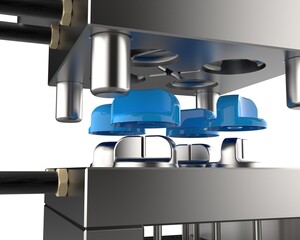
Plastic Mold Types and Their Applications
Plastic molding is a process that uses heat and pressure to shape polymer. It is a popular method for producing a wide range of products. It can also be used for producing metal parts. Read on American Plastic Molds for more information.
Family molds are ideal for smaller runs, as they reduce the number of injection cycles required. This can help to improve production rates and lower costs.
Injection moulding is a great plastic manufacturing technique that can handle high-volume production runs. The process uses a custom-designed mold that resembles the product part you need, which is then split into two halves and clamped together using hydraulic rams. The injection machine then injects the raw polymer into the mold’s cavities and a screw pushes it through. This increases the temperature of the raw material, allowing for better flow, and reduces Van der Waals forces between molecules that can hinder movement in a low-temperature state. This creates a homogenous blend that is easier to shape and gives the finished part its desired finish.
This process can be used to produce a wide range of polymers, including all thermoplastics and some thermosetting plastics. This versatility makes this type of injection molding well-suited for a number of different industries and applications. However, each polymer has its own unique set of requirements when it comes to injection moulding. A good injection moulding manufacturer will have extensive knowledge of how each type of plastic behaves in this process and how best to manipulate it for a specific end result.
The design process for plastic parts produced with this method begins with a detailed 3D model created in CAD software. These models serve as the blueprint for the molded part, with consideration given to factors such as large undercuts (to allow the part to be easily ejected from the mold) and proper draft angles and wall thickness to ensure that the resulting part will be strong and durable.
Another important factor to consider is the injection moulding machine itself. A reliable machine will operate swiftly, boosting production rates and helping to lower costs per unit. It should also be user-friendly with easy-to-use controls and software that can adapt to changing production needs without additional retooling.
One of the most significant benefits of injection moulding is its ability to produce parts with an exceptional finish that is both aesthetically pleasing and durable. This can reduce or even eliminate the need for further post-production processing like painting or polishing, saving time and money. Additionally, this type of plastic manufacturing is able to achieve a very high level of strength by adding fillers into the molten plastic. This helps to add weight and density to the final product, making it a more robust and longer-lasting alternative to other plastic manufacturing processes.
Extrusion Moulding
This is a common manufacturing process for making different types of plastic products. It involves forcing molten plastic through a 2d die to form it into a specific shape. This is a popular choice for manufacturing things like curtain tracks, straws, rods, and wire insulation. It is also good for making products that need a large number of lengths of the same essential design/product. It has the advantage of being more cost-effective than injection molding, since it can produce multiple parts at one time. It can also be used to create products that need internal features without the need for a draft, and it generally produces a smooth surface finish.
It is ideal for making hollow pipes and tubing, such as PVC water and sewer pipes, as well as many other industrial, commercial and medical applications. It is also good for making plastic films, thin sheeting and coatings, wire insulation, filaments, and fibres. Drinking straws, motor fuel lines, window glazing and glass replacements, and ‘blister’ packaging are other examples of this type of product.
One major benefit of extrusion moulding is that it produces less waste than injection molding. This is because any trimmed material from the end of a run can be ground up and fed back into the machine, to be reintroduced into the manufacturing process. This is a great way to reduce material costs and ensure that all of the plastic used in production gets put to good use.
While the advantages of extrusion moulding are considerable, it is important to consider the environmental impact of this method of production before making a decision. The production of plastic products, including extruded plastic, requires a significant amount of fossil fuels. This contributes to climate change and greenhouse gas emissions, and it can take hundreds of years for some plastics to break down in the environment.
As with injection molding, it is possible to add fillers to the melted plastic to enhance its strength and resilience. However, this is usually only done when producing a high volume of the same product. It is not as suitable for small batches, because it is expensive to build the molds for each new product.
Rotomoulding
Unlike injection moulding, which requires pressure to force the plastic into the mold, rotomoulding relies on gravity and centrifugal forces to spread the molten material around the cavity. This allows the operator to achieve greater levels of control over wall thickness, which is crucial to a product’s strength and durability. The rotational process also helps prevent the formation of air bubbles within the resulting hollow plastic product.
When the plastic is cooled, the product’s walls are solidified and become rigid. The rotomoulding process also produces stress-free products, meaning they are less likely to deform or crack during use. This is achieved through the rotational process and a careful selection of the type of plastic used. Polyethylene (PE) is a popular choice for rotational molding, due to its low cost and high heat resistance. It can be found in a wide range of sizes, from toys to 50,000-litre tanks.
The rotary process also enables the production of complex shapes, including curves and angles. This makes it ideal for producing tanks and leisure craft, but also medical equipment, children’s toys, and more. However, the limiting factors for this type of plastic moulding are the need for additional equipment to speed up the cooling process and the inability to automate the process.
One of the biggest benefits of rotomoulding is that it uses a very low amount of raw materials, making it more sustainable than other methods of producing hollow plastic products. Furthermore, rotomolded plastics are often made from recycled materials, which reduces the need to mine fresh materials and helps to minimize environmental impact.
Another benefit of this method is that it allows for the manufacturing of large plastic products, such as TranPak’s MegaBin. This plastic hopper bin is a perfect example of how the combination of the right plastic and rotational moulding can produce a high-quality, robust product that is suitable for an array of applications. To find out more about how rotomoulding can benefit your business, contact us today. Our team of experts can advise on the most appropriate plastic for your application and recommend the best manufacturing technique to suit your needs.
Cast Moulding
Cast molding is used to produce a wide range of products, from small automotive components to kitchenware. It involves pouring liquid plastic into a mold and then allowing it to cure. This process allows for tight tolerances, meaning that the final product will be very accurate in terms of shape and size. It also offers flexibility, as the mold can be altered to accommodate changes in design.
One of the main benefits of using this type of mold is that it is relatively inexpensive and quick. Unlike injection molding, which requires a large upfront investment in tooling, urethane casting can be done for under $2,000, making it the ideal option for entrepreneurs looking to keep costs low.
Another benefit of this method is that it produces high-quality products. The liquid plastic poured into the mold is heated, which helps to create a smooth, dense surface. This helps to prevent warping, dents, and other defects that can occur in the final product.
This method of molding is also very versatile, as it can be used to create any type of object. In addition, it can be used to make prototypes, allowing entrepreneurs to test their ideas before investing in expensive production-quality tools. Additionally, the mold can be made of a variety of materials, including polyurethane and polyester.
A downside of this type of molding is that it can be difficult to remove the finished product from the mold. This can be overcome by using a technique called pressure casting. This involves putting the finished product on a piece of wood and applying pressure to it, allowing the resin to pull away from the object. This can also help to eliminate air bubbles, which can be problematic in some cases.
Despite these challenges, cast moulding is an excellent way to make a wide range of products. It is important to choose the right resin and mold material for your project, though, to ensure that it will be durable and long-lasting. It is also important to know how to properly mix the resin and to use a proper mold to ensure that the product will be as clean and smooth as possible. This will ensure that your final product is of the highest quality possible.
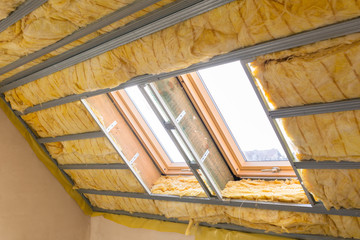
Understanding the Insulation Removal Process: What Homeowners Need to Know
Insulation Removal Perth can be dangerous, especially if hazardous materials like asbestos are involved. It’s important to seek professional help to ensure safety and efficiency.
Damaged insulation can create serious problems for homeowners, including rodent infestations and mold outbreaks. Thankfully, there’s an easier way to replace it – injection foam insulation.
Assessing the Problem
When insulation is in good condition, it helps regulate temperature and improve indoor air quality. However, older or damaged insulation can reduce energy efficiency and increase the risk of costly repairs. Fortunately, homeowners can avoid these problems by replacing old insulation with new materials. This simple investment will lower utility bills, protect the value of their homes, and keep their families comfortable all year round.
Insulation is one of the most important investments a homeowner can make in their home, and it should be well maintained. Inspecting the attic or wall spaces for signs of damage or deterioration is a great first step in assessing whether it’s time to replace the old insulation.
The most common sign of worn out insulation is high energy bills. When insulation ages, it loses its ability to trap heat or cool air, and air can easily penetrate the house through gaps or thin spots in the attic or walls. This makes it more difficult to control temperatures, and it can lead to drafts throughout the house.
Another sign that it’s time to remove old insulation is a mold or mildew problem. These issues can cause respiratory problems, and they may also be a sign of water damage or rodent infestation. Infestations in insulation can be dangerous, and they should be treated immediately.
If a homeowner decides that their existing insulation is beyond repair – maybe it’s saturated with moisture or infested with pests – the best option is to hire a professional to perform the removal and install new insulation. This process involves a thorough inspection of the attic space and walls, fixing any structural problems, and preparing the area for new installation.
Creating a Removal Plan
Insulation Removal involves removing old or damaged insulation material from a home, typically in the attic. It can be done by hand or machine and is usually performed to reduce utility bills and to make a home more comfortable for residents. Often, older insulation can contain harmful materials such as pests, mold, asbestos and vermiculite that may pose health risks. This type of insulation should be replaced with new, higher quality insulation to ensure that the home is safe and energy efficient.
Before starting the insulation removal process, it’s important to create a plan to help ensure that the job is completed quickly and efficiently. First, a thorough inspection should be conducted to determine the type and condition of the existing insulation and why it is being removed. This information will be used to determine the best way to remove the insulation and whether it should be done by hand or machine.
If you decide to use a machine, the attic will need to be cleared and prepared. The area must be clear of debris, and a ladder needs to be set up under the attic access door. A HEPA filtered shop-vac can be used to vacuum the attic, and waste bags need to be placed inside the attic. The commercial vacuum will need to be started and a helper will be required to monitor it while in operation.
If you aren’t comfortable with the idea of using a machine in your attic, a less invasive method is to have spray foam insulation added. This method is quick, clean and less disruptive to your home than tearing down walls to add insulation.
Preparing the Area
Insulation is a crucial component of a home, providing both comfort and energy efficiency. It can also serve as a barrier to noise and help to regulate temperature. However, over time insulation can degrade and become damaged. In addition, pests can create nests or burrows in the insulation, leading to a loss of its protective properties.
If your insulation is old, ineffective, or infested with pests, it’s important to remove it and replace it with new material as soon as possible. This will help to protect your family’s health and safety, as well as your wallet, by lowering your energy bills.
The first step in the insulation removal process is preparing the work area. This involves clearing out any items that are in the attic and creating a clear workspace. It’s also a good idea to isolate the workspace from the rest of the house, as this will help to avoid contamination from the old insulation and any debris that is thrown away.
It’s also essential to wear the proper equipment, including safety glasses, dust masks, and long sleeves. This will help to prevent any irritation caused by insulation fibers or any other potential allergens or irritants. It’s also a good idea for homeowners to make sure they have a sturdy ladder or scaffolding in place before beginning the project.
Finally, it’s important to set up a trash bin or bag station outside the attic entry point so that the waste can be easily disposed of after each session. The time it takes to complete an insulation removal and replacement project can vary, but it’s important that it is done correctly to ensure safety and effective results.
Using the Right Tools
Insulation removal is a time-consuming task, and it’s important to have the right tools for the job. You will need a powerful insulation removal vacuum, heavy-duty waste disposal bags, and a ladder or other equipment to reach high areas. You should also wear protective gear, including a dust mask and goggles, to avoid irritation from the insulation materials.
Once you have the proper equipment, it’s time to begin the removal process. Start by clearing out any clutter from the attic space to create a clean and accessible work area. Then, inspect the insulation to determine its condition and type. You will likely want to remove any that has been contaminated by water, as it can lead to mold and mildew growth. It’s also a good idea to replace damaged insulation to prevent future issues.
The next step is to use a rake or other tool to break up any clumps of insulation so they can be easily sucked up by the vacuum. After you have removed the old insulation, be sure to place it in heavy-duty waste disposal bags and seal them tightly. You will also need to transport the bags to a designated disposal site or facility.
The process of removing and replacing insulation is necessary for keeping your home comfortable and energy efficient. However, it’s important to know that this is a complex task and requires professional expertise. Choosing the right company to handle the job will ensure efficiency, safety, and results you can trust. In addition, hiring professionals will ensure that the attic space is cleaned properly after the project is completed, which helps to maintain a healthy and safe environment.
Disposing of the Waste
Insulation is a messy product, and disposing of it requires careful consideration. The first step is to identify what type of insulation you’re working with, as different types require unique handling and disposal methods. Some can be recycled, while others must be disposed of as hazardous waste, depending on their composition.
It’s also important to take precautions during the removal process, as some materials pose health risks and need to be handled carefully. Ensure that you’re wearing appropriate protective gear, including long sleeves and pants, thick work gloves, and safety goggles to avoid the risk of irritation from glass fibers or slivers of fiberglass. You should also wear a dust mask or respirator to prevent inhaling any dust or debris during the process. It’s also essential to ventilate the area as much as possible, as this will help to minimize the buildup of toxins.
Once you’ve finished the removal process, be sure to dispose of all of the insulation waste properly. Leaving it in the attic can cause further deterioration, and it can also contribute to energy waste in your home. In addition, it may harbor odors that are difficult to eliminate.
If you’re unsure of how to dispose of the insulation, consider hiring a professional waste disposal company. They’ll know the proper guidelines for disposal and can handle the entire process from start to finish. In addition, many companies offer recycling options that can help reduce your carbon footprint and align with eco-friendly waste management goals. In the end, a responsible and efficient approach to disposing of insulation can help you achieve a more sustainable home.